Saturday, March 14, 2020
New Blog
I've started blogging again. My new site is newdealblog.royseonline.com. Check out my first article here.
Tuesday, September 9, 2014
Goodbye & Good Luck
As you may have already guessed, I've decided to move on. This is the last DIY article, and my new blogging endeavor will be aimed at helping people in a different way. Did the Ball home get fixed up and stop breaking? Not at all. Here's a snippet of what's happened since the last article:
Replaced 2 outlets in the house with USB wall chargers. These babies charge your phone, tablet, headset, etc. with a USB cable. No adapter is required. Also, each USB outlet pushes 2 amps, which is 2-4x more juice than most plug-ins.
Hooked up 2 Sonos Play 1 speakers for my sweetie. These speakers stream Pandora, XM, or your favorite internet radio directly from the internet via a Sonos Bridge. Your smartphone or PC acts as a remote. It's hard to believe that so much sound comes out of something so small.
Repaired the stairs and rails on the deck. It needs to be totally replaced, but we're lacking the funds this year to wave a magic wand and pay someone. I'd rather just buy a gallon of kerosene and strike a match, but my friends say that might be dangerous. My fall project will be installing a new floor, staining the wood, and firming up the rail supports with carriage bolts.
The current project is replacing the face plate on our high class Bosch dishwasher. Hey, you need at least one high class thing in a Ball home to spruce it up. This expensive piece of plastic ($75 with shipping) is weak and poorly designed. Maybe the new one will last a little longer. At that price, building a Bosch dishwasher from parts would be an estimated $100,000.
Thanks everyone for reading, and good luck with your own DIY projects. The sun is setting, my bourbon glass is empty, and I bet you can hear ice rattling.
Installed a new Chamberlain garage door opener when the 20 year-old unit died. If your vehicle was built prior to 2012, the Homelink option in your cars probably won't work with a new opener. The "version 2.0" Chamberlain opener needed a Homelink repeater to work with our vintage 2003 built-in buttons. The job was tedious and took a long time, but wasn't overly complex.
 |
| Note: Belt drives are quieter than chain drives. |
 |
| 0% to full charge on my Galaxy 5 in 2 hours |
Replaced 2 outlets in the house with USB wall chargers. These babies charge your phone, tablet, headset, etc. with a USB cable. No adapter is required. Also, each USB outlet pushes 2 amps, which is 2-4x more juice than most plug-ins.
 |
| These little guys thump! |
Hooked up 2 Sonos Play 1 speakers for my sweetie. These speakers stream Pandora, XM, or your favorite internet radio directly from the internet via a Sonos Bridge. Your smartphone or PC acts as a remote. It's hard to believe that so much sound comes out of something so small.
Repaired the stairs and rails on the deck. It needs to be totally replaced, but we're lacking the funds this year to wave a magic wand and pay someone. I'd rather just buy a gallon of kerosene and strike a match, but my friends say that might be dangerous. My fall project will be installing a new floor, staining the wood, and firming up the rail supports with carriage bolts.
The current project is replacing the face plate on our high class Bosch dishwasher. Hey, you need at least one high class thing in a Ball home to spruce it up. This expensive piece of plastic ($75 with shipping) is weak and poorly designed. Maybe the new one will last a little longer. At that price, building a Bosch dishwasher from parts would be an estimated $100,000.
 |
| See the broken plastic below the button? |
Thanks everyone for reading, and good luck with your own DIY projects. The sun is setting, my bourbon glass is empty, and I bet you can hear ice rattling.
Sunday, March 16, 2014
DIY Android Repair
 |
| About to try to fix a busted phone |
At this point, the choices were limited.
- Bleed to death while swiping through Facebook.
- Buy a box of Band-Aids to use after typing a text.
- Apply packing tape and hope the sensor can detect my fingers.
- Put the phone in a ziplock bag and order some parts off the web.
The glass on your phone only has one special property. It conducts bio-electricity from your finger to the sensor on the phone. The sensor has all the smarts to know if you clicked, pinched, or zoomed. Under the sensor is the display, which was my downfall in this repair. The glass is simply glued onto the sensor. Warning: YouTube make this look easy, but it's not.
Here are all the tools necessary for a glass repair.
- Heat gun: About $25. Don't use a hairdryer, or you'll be trying to get your glass off until this time next week. A heat gun is hotter, and more powerful. Mine was just fine on the low setting. I already had one of these for the unwritten "boat blog".
- New glass: $5. If you already have the tools.
- New glass kit: The $15 kit on Amazon had glass, guitar picks, a suction cup, and screwdrivers. Go ahead and throw away the screwdrivers, because you'll tear up your phone with them. Since I only used the guitar pick out of the kit, it would be cheaper next time to just buy the glass and pick up a handful of guitar picks at a music store.
- UV Glue: $10. Also called LOCA. The glue doesn't harden until you hit it with UV light. The best ranked glue on Amazon had enough glue to fix about 5 phones (10ml).
- UV Flashlight: $10. Used to set the glue. This one had plenty of power.
- Sunglasses: $20 at Wal-Mart. UV light is not good to get in your eyes. Put these babies on when setting the glue.
 |
| Heat Gun |
 |
| Use guitar pick to push between glass and sensor. Don't pry!!! |
Carrying a Galaxy G4 in a ziplock bag is totally uncool. After all the parts arrived, I jumped all over it. To start, remove the back cover and take out the battery, SIM card, and any memory cards. Hit the glass with a heat gun about 3 inches away, low setting, for 3-5 minutes. Hairdryers will work, but take much longer. Heat guns are much faster, and all the patience you can muster is necessary for the job. The next step was my worst mistake on this repair. I used a tiny screwdriver to get under the glass to start pulling it up. Don't do this. The best way to start is in a corner of the phone. If the glass doesn't come up, keep hitting it with the heat gun. Also, never pry the glass out. Go in with a guitar pick flat against the glass. If the glass is badly shattered, put a strip of packing tape on it to keep the glass in one piece. You'll need to hit the phone with the heat gun several more times and go sloooooooooooooooooooooooow. Don't pry, just keep working the pick between the glass and sensor and peel it off like a sticker that you don't want to tear. Some phones have buttons that are attached to the glass via a small ribbon, so be careful to pop them off the glass to avoid breaking the ribbon.
 |
| Old glass. What a mess. |
Once the glass comes off, use Windex or alcohol to clean the sensor. This was the longest part of the journey. I kept rubbing the glue into a ball and wiping it off with a paper towell. When the sensor is clear of glue, it's time to get LOCA.
 |
| The old glue was a big mess and time consuming to remove |
Watch a couple of YouTube videos before applying the glue. The good guys take about 30 minutes, lowering the glass onto the phone an pressing all the bubbles out. Apply way more glue that what you think is enough. I put on 2ml with a big blob in the middle and used an X pattern going out to the edges of the phone. Probably 2.5ml would have worked better. Be careful not to get any glue on the buttons on the bottom of the phone. They're real buttons that need movement and contact, so don't glue them down. Once you work out all the bubbles, wipe off the glue from around the phone, and use some Windex to clean any glue off the top of the glass. Mine was a big mess and took a long time to get the glass clean. The "pro's" make it look simple, and it's really not.
 |
| New Glass |
So how did the phone turn out? Not so great. The job was about 2 hours and $45. The initial place where I pried up the glass with a screwdriver now glows with a pinkish hue. The ping blob runs 3/4" into the phone, which totally sucks. The touch screen functions perfectly, but there are a few air bubbles in the glue. The bubbles aren't so bad, but the phone looks a little less than professional. What about fixing broken phones for all my buddies and charging a bottle of bourbon? Not going to happen. The next repair would only need a $5 piece of glass, but my dreams of opening up a phone repair shop in the basement are about as cracked as the glass that came off the phone. The pink blob could probably be avoided on the next one, but the job is tedious, time consuming, and more skill is needed to do a good job than the average person possesses. I just don't have the experience or patience for the job, so my recommendation would be to pay an expert $100 and ship off the phone.
Am I bummed? More than a little, but the phone is functional with minimal spend, and the ziplock bag is in the trash. Is a new sensor on order yet? No. Pink is my new favorite color.
 |
| Not my best work |
 |
| I don't recommend this job for DIY |
Tuesday, March 11, 2014
Small Engine Tune-Up In The Cloud
 |
| Small Engine Fleet |
Dropbox is a service that let's you store files "in the cloud". "The cloud" is a goofy marketing term that everyone's latched onto that just means that a service is hosted on the internet. You can't sit through an IT meeting anymore without a vendor wanting to put something of yours in the cloud, even though most times it ain't cheap. In less advanced times, people pretty much built all the tools they needed themselves and hosted applications in their data center or home. Home users just carried around paper and pencils. These days, there's a ton of services to pick from, and Dropbox is a file storage service. The great part is that the first 2 gigs of storage are free. Dropbox also has an app for just about every device including iPhone/iPad, Android, and PC. How in the world does Dropbox help me work on engines? Read on, and head to the shed with me to find out.
 |
| The shed |

SmallEngine.XLSX was then handily deposited into the Dropbox folder on my PC. The app immediately sent the spreadsheet to "the cloud". WARNING: I can't vouch for the security of Dropbox. Seems like everybody and Target are being hacked these days, and it's only a matter of time before people get you junk on Dropbox. That's why things like passwords, legal documents, and social security/credit card/bank account numbers should be closely guarded and perhaps closer to ground level than clouds. Better that a hacker gets pictures of kittens, the manual to my new TV set, or all the data points necessary to tune up a few small engines than something really important.
 |
| Supplies |
Tiller Repair
The neighborhood tiller (AKA - my tiller) had a pretty irritating problem. Basically, you had to pull the thing to half throttle, wait for RPM's, and then till as best as you could. Full throttle killed the little Troybuilt. Last year, three of my neighbors borrowed the neighborhood tiller, and nobody complained after they got the special instructions. It used to be worse. The neighborhood tiller didn't start at all when he first washed up on shore. After cleaning out the carb, the motor started, but the half throttle thing was the best repair that could be done by the mechanic who lives in my house (AKA - me). Unfortunately, carbs that are smaller than a Kennedy half dollar are difficult to get working right. The jets are so tiny, finding the issue with the naked eye (or readers in my case) is nearly impossible. My advise the for these pint size carbs is to just buy a new one if it isn't delivering the proper air/fuel mixture. Yes, the repair shop can also help, but ours is not in a handy place, and new carbs are about the same cost as paying the mechanic.
 |
| New Carb & stud installed |
While taking the old carb off, I ran into something totally new, E-socket studs. Grrrr..... To take the carb off, yet another tool was needed. An E-socket bolt looks just like the head of a Torx screwdriver. One other piece of advise, don't try to unscrew an E-socket with a set of pliers. In my case, the head of one stud stripped off with the greatest of ease and so did the threads needed to remove the nut. The carb was stuck on the tiller, and a hacksaw was needed to get the thing off. Additionally, the airbox took some collateral damage in the process. Luckily, www.troybiltpartsonline.com store sold a carb, stud, and airbox for the tiller, and they took my $90 via Paypal.
 |
| New airbox installed Note: E-socket bolts really stink! |
When the weather warmed up enough for some outdoor work, the tiller's new carb and airbox were installed. After 2 pulls, the thing ran like a scalded dog!!! All the gardens and flowerbeds in my neighborhood better watch out, because you can flog the throttle now.
Tune Time
 |
| Pun intended |
 |
| The "new" sub |
Spark Plugs
Does your weedeater or lawnmower take 100 pulls and 15 curse words to start? This one is an easy fix. Just put in a new spark plug. You never want to be running a spark plug as old as the mustard in your refrigerator. Am I the only one who's been using the same bottle since moving into the house? That stuff never goes bad does it? Anyway, my opinion is that a new spark plug should go in every year. $2 is a small price to pay for not throwing out your back when pulling the cord. Having the plug type in Dropbox makes it even easier.
 |
| Pressure washer plug RJ19LM |

 News Flash: Small engines have air filters, and you can pretty much look at them to see if the need to be replaced or cleaned. The filter material will be made of either paper or foam, and maintaining each is a different deal altogether. The foam ones are a little bit of work. Spray them out with the hose, wring them out a few times, and set them in the warm sun for an afternoon to dry out. Most manuals will tell you to drizzle 30 weight motor oil on a dry filter to help keep the dirt out. I think it's much easier to use filter spray oil that can be picked up at a motorcycle shop. Uni-Filter and Bel-Ray both make good products. Just put on a pair of rubber gloves, spray oil on the filter, and squeeze the oil into the foam. Don't soak the foam with oil, just coat it evenly and pop the filter back in. Paper filters are easier, but need to be replaced every time. Wal-Mart or Meijer has the best prices on Briggs and Stratton paper filters. If your lawnmower is always running in dirt, dust, and muck like mine, then best practice dictates that she needs a new filter every year. The pressure washer doesn't, and gets minimal use, so she isn't getting one this time. The gen doesn't need one either. His was replaced over the winter just before the storm of the century almost hit.
Oil Change
Time to change the oil. I'm a firm believer in changing oil in all the small engines every year, and Valvoline is my favorite. They all take 30 weight, and all the motors combined take just north of 2 quarts of oil. That's pretty cheap motor insurance, and changing the oil isn't a tough job. Check your repair manual to see how to get the oil out. My lawnmower and pressure washer have drain plugs. To get to the drain plug, you usually need to take off a few parts. Note, make sure you pull the spark plug wire before messing under a lawnmower. That way it can't start accidently.
 |
| The drain plug on the pressure washer is accessible after the water pump is removed. |
 |
| Same deal on the lawnmower with the blade off |
 |
| The lawnmower blade was in bad shape. I hit it a few times with the Dewalt grinder to put a sharp edge back on the blade. If you don't have a grinder, a new one is about $10. |
The lawnmower needs the blade removed, and the pressure washer must have the pump taken off (3 bolts). See the note on the lawnmower line in SmallEngine.XLSX? Please, please, please make sure that you get the correct torque on your lawnmower blade.
 |
| 50 ft-lbs = 1 foot + torque wrench + 1 grunt |
It's not a good idea to save money on an oil change, only to chop off your foot when the blade comes flying off. Don't have a torque wrench? Easy, head to Harbor Freight or ask for one for your birthday. Before draining the oil, warm the motors up to operating temperature. That'll help get any sediment out of the motor when the oil drains. If you're baffled after looking for the drain plug, please understand that not all motors have them. To drain the oil on my generator and tiller, just turn the things upside down. Pretty low tech, but it works. If you have a riding lawnmower in the shed, stick the oil filter model in Dropbox and change it every year.
Before leaving, I want to give you one more piece of advice that'll save you time and money in the long run. The main cause of small engine trouble is either a spark plug or a gummed up carb. Spark plugs are an easy fix, but the carb can be tricky as you've seen above. Today's gas with ethanol isn't really made to sit around in a carburetor. When it sits, the fuel separates into regular gasoline plus a small helping of super glue. Small carbs are full of tiny holes that get clogged easily and unclogged with hours of work. The best way to counter the ethanol problem is to use a fuel stabilizer. My favorite is Stay-Bil, and every gallon of fuel that goes into these engines gets treated. Treating the gas costs more in the short term, but saves time, money, and trouble over time. If you want to go one step further, drain the gas tank and run all the gas out of the carb at the end of the season.
So to summarize:
- Get a Dropbox account and stick stuff in there that you need to reference on the fly (like spark plug models, vacation pictures, or your grocery list). Never in a million years put confidential stuff in "the cloud". Well maybe "the cloud" is OK for secret stuff if you use 2-factor authentication, 1024 bit encryption, and at least a 16 character password.
- Change oil and spark plugs every year for easy starting and long engine life.
- Change/clean air filters in your high use equipment or if the gear is operated in dusty/dirty conditions.
- Treat fuel with stabilizer to keep carburetors gum-free.
- If someone else in your neighborhood owns a tiller, understand it's much easier to borrow the neighborhood tiller instead of owning one.
Monday, February 10, 2014
Baking soda 101
Today, the blog covers something obvious. Most people put baking soda in their refrigerator, but my guess is that very few people use the product to it's fullest extent. Until just recently, my refrigerator got a new box every 2-3 years. That's enough, right? Maybe if you never put leftovers in there or you don't like much ice in your drinks. How often do you need to pull baking soda maintenance on a refrigerator? Read on to find out.
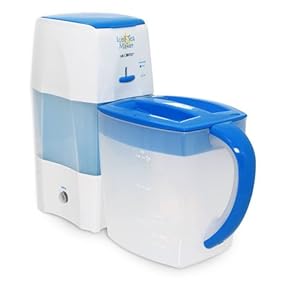 |
| One of my favorite toys, the Mr. Coffee Ice Tea Maker |
- The ice tea tasted good. Really good.
- My morning waffles didn't have that funky taste anymore.
- The Friday night after the change, my bourbon had much better flavor.
 |
| 13 pound bulk pack of Arm & Hammer Cost: $10 Life Expectancy: 2 years Note: First grade science experiments with vinegar may shorten lifespan. |
 |
| Fill 'em up |
 |
| Flow through vents are my fav |
 |
| Secure with tape |
So, how often to change out the baking soda? The easy answer is -- depends. I don't have a set time for this job, unlike my furnace filters. A pound of baking soda has a finite amount of odor absorbing power. Changing every month is a bunch of hooey. If you cook spicy meals with onions, peppers, chili powder, and spicy sausage, they need to be changed every couple of weeks. Believe it or not, strawberries have a fairly strong aroma that can take over a refrigerator. If you don't store a lot of strong smelling food in there, a dose of baking soda can last 8 weeks. Keeping the shelves and drawers clean also will extend the interval. Throwing away leftovers and checking for moldy cheese also helps. Items like ice and breads are very quick to absorb refrigerator odors. Change out the baking soda at the first hint of an odd flavor to keep everything tasting great.
So go ahead and swap out those boxes of baking soda that have been in your fridge since you bought it. Your iced tea or bourbon will never taste the same.
Tuesday, January 28, 2014
House Blog Throwback -- The Humidifier

In 1996, Google wasn't here yet, dial-up was king, and the best PC out there was the wretched Pentium 75 with a 15" tube monitor. At that time, I didn't know Ancient Age from Pappy Van Winkle. Boy, this was going to be tough without today's tools. One day that winter, a part of my childhood came back to me. We had something in the hallway called a humidifier. Hmmmmm, time to hop in the car and head to Sears. The salesman actually spent time with us back in the day, and we settled on the Kenmore Quiet Comfort 13. Funny, my Bose headphones are Quiet Comfort 2's.

The Kenmore has two 3 gallon tanks and can pump 13 gallons of water in the air if you turn it up all the way. Sounds crazy doesn't it? 13 gallons is a lot of water, but this Kenmore can crank out water faster than gas through a Chevy Suburban. An important add-on to the humidifier, a humidity meter, helps you manage the settings. Luckily, I found one of these at Ace Hardware in the sale aisle for 99 cents at around the same time.
 |
| Perfect Level |
The humidifier has 3 controls: fan speed (more of a volume knob), humidity level, and power to 1 or 2 fans (always left on "2"). Judging from my 99 cent gauge, 30% is a comfortable setting. Without the Kenmore running, the 1996 house maintained 0% humidity during cold weather. Humidity in your house does a couple of very useful things.
- Moisture in the house makes the air feel warmer.
- Sinus membranes don't appreciate 0% humidity. They dry out and get irritated (mine bleed). 30% keeps the sinuses happy.
- Lower instance of human taser. Seriously, one time in the old house, I saw a blue spark when I put my hand on the wall. Yes, my wife still touches my arm before she kisses me, but the ouch factor is much lower with the humidifier.
- Skin doesn't dry out as bad during cold weather.
 |
| Humidifier Controls and Fans |
From my experience, a house with gas heat on a concrete slab maintains the lowest level of humidity in the winter. On the other side of the coin, a house with a heat pump on a crawl space maintains the highest level of humidity. One house I had didn't even need a humidifier. Well, that one also had a sump pump in the crawl space to keep the water out.
Here are a couple more tips before you leave:
- The very best water treatment product is BestAir Bacteriostatic and Algae Control, and Meijer keeps it in stock. Water treatment keeps bacteria and algae from growing, the family safe, and the air smelling good. Crud will grow in a cold air humidifier if you don't use this stuff.
- Change the wicks every month or so, and sooner if a moldy smell develops. Sears has the most expensive ones, and Lowe's has the best price. Wicks are pretty low tech, so I can't see paying $10 more for the expensive ones. Buy these guys at the beginning of the season, because they'll be sold out by the end of January.
- Clean out the insides of the unit and dump out the water when you change the wicks.
- The best place to put the humidifier in on an interior wall. The humidity is dispersed more evenly, and you're less likely to see moisture build up on windows.
- Dump out the water if the weather warms up, and the unit doesn't run for a day or two. The water treatment can only fight so long before the ick wins the battle.
 |
| Wish I'd found this stuff in 1996 |
Wait, you mean nothing broke in your home this month? Well, I had to rewire the light switch on my attic furnace (that would be a 1 picture, 2 line article), soldered a new LED bulb in my 3 year-old's Lightning McQueen night light, and we're also developing a Lego themed Pinewood Derby car for the upcoming cub scout race. Yes, another large scale project is cooking, but that one will have to wait until the Polar Vortex goes home.
Monday, December 30, 2013
Twas the DVD Before Christmas
.jpeg)
One of my favorite Christmas movies of all time is the old version of "How the Grinch Stole Christmas". Last year, on the night before Christmas Eve, we popped popcorn, poured some cold beverages (the little guys had Capri Suns), and the whole family sat on the couch as the DVD started to play. The story was about 5 minutes in when the DVD froze on an image of the Grinch. Crap, it's time to fix something else.
 |
| DVD ruined? Read on. |
After popping out the DVD, the issue was obvious. We had taken the movie on a trip, and the disc never made it back into the case. A closer inspection revealed that a scratchy haze was covering the data side of the DVD. The damage was bad enough that the player couldn't read the movie. What's a guy to do in a pinch? Unfortunately, the holiday shows weren't all that great on Netflix in 2012. The best one available was the 1977 version of "Fat Albert Christmas Special", so I made some jokes about starting a new tradition and hit play. The show was better than expected, but fell a little short of "The Grinch".
| Hey, Hey, Hey |
 |
| 3M Headlamp Kit - Sponge is the last step |
- Put on your eye protection.
- Apply rubbing compound to the shiny side DVD (opposite of the label). Probably OK to skip if you don't have any, but the 3M kit comes with more than you need for the headlamp job.
- Lightly wet the sponge
- Pop attachment on an electric drill
- Buff the DVD with the drill until the haze starts coming off. "The Grinch" took a couple of minutes
- Rise off DVD
- Dry off with paper towel
 |
| "The Grinch" is shiny again!!! |
After finishing, the DVD looked shiny again, but was still a little scratched up (DVD players can handle a few scratches). I popped the disc into the player and couldn't believe my eyes. The movie played all the way through flawlessly!!! Thanks to this little trick, our Christmas tradition of viewing "The Grinch" is still running strong.
Subscribe to:
Posts (Atom)