Monday, November 25, 2013

Refrigerator 2 for 1 Special

Hmmm.  Someone is sure hitting the ice hard this weekend, and the icemaker can't seem to keep up.  Our family owns an iced tea brewing machine, and we load the glasses to the rim on a regular basis.  And bourbon, well, if you've read any post on the blog, you already know about that.  The ice level kept getting lower all weekend, and Monday morning, it was gone.  What's Big B to do in this situation?  Easy.  I created a cardboard sign, stood on the street corner, and begged for ice while the neighbors drove by.  After a few honks, pointing, and laughter, I got out some tools.

We own a Whirlpool Gold side-by-side refrigerator and absolutely love it.  About ten years ago, the Lowe's salesman told us that the "Gold" model is built so tough that you can lift it off the ground by the doors (he did this in the store).  The ice bucket is removable (handy), the shelves will contain 12 ounces of liquid (also handy), and the layout is super convenient.  Was I ready for a new refrigerator?  No way.


The first thing was to run a few tests:
  • Check icemaker for "stuck" ice: Nope.  This actually happened a couple of times and clearing the ice out fixed the issue.
  • Check power plug going to icemaker wiring harness with multimeter:  Good.
  • Water supply:  Good
  • Ice Bucket Sensor:  Good. When you put your finger in front of the "electric eye" the light would blink twice.  That had to mean something.
All those things passed, and the refrigerator would not even fill the ice tray up with water.  After a little digging and a cold beverage, a hail Mary was thrown.  I didn't have a clue what was wrong, but I knew that a few things were not wrong. 

Amazon has been starting to get more business after the Prime subscription.  A good deal of research revealed that almost every refrigerator in the US is manufactured with one of about 3 different icemakers.  The one in mine fits in at least a dozen models.  After a few clicks, a new OEM icemaker was headed my way for $90.  They had an aftermarket icemaker for half the price, but the reviews were not all that hot.  Additionally, people seemed to say that icemakers go bad in about 10 years or so (the exact age of mine).  After 2 more days of begging for ice (thanks Mom), the new one showed up. 


New OEM icemaker


Icemaker installed

Install for this model was a breeze.  To take out the old one, remove the cover (no tools), slide out the old icemaker, pop the power plug, reattach plug to new icemaker, slide in, and you're done.  The plug was a little stuck on removal, so the only tool necessary was a #2 flathead screwdriver.  Install was the reverse, and I was done in 15 minutes.  Soon after, the sound of ice dropping was music to my ears.  That lasted for about 3 days, and the begging started again.


Arrggghhhh.  The water dispenser was leaking.  Not too bad, just a steady drip that was bad enough to shut off the water supply to the refrigerator.  After taking apart the door, I noticed that the water tube was pretty dumb.  The door had no valve to be seen, so the dispenser must trigger a valve someplace else.  Taking another guess, a water inlet valve was heading my way for $50, this time with 1 day shipping.  This part would also fit on about 500 different refrigerators.  Could this part be installed by a home improvement wanna be like me?  A couple of YouTube videos had me thinking yes, but it just didn't work out that way.

Water Inlet Valve


When I arrived home, the refrigerator was pulled out, and my wife was sitting behind it with a couple of screwdrivers, a small socket wrench, and a razor knife.  A smile immediately came to my face.  Here are the steps, and install is roughly an hour:

Here's the location of my water inlet valve

  1. Pull refrigerator away from the wall.
  2. Hopefully, the water supply is already turned off.
  3. Unplug refrigerator.  (you don't want to get fried)
  4. Unscrew the water line from the old valve
  5. Take out the bolts from the back of the refrigerator where the water line goes in.  On mine, a cardboard cover is on the bottom, and you need to take out about 4 bolts.
  6. Pull the cover out enough to work on the valve.
  7. Take out the 2 bolts that hold the valve to the frame
  8. Remove plastic water lines from the valve (one goes to icemaker, one goes to water)
  9. Pop out wiring harnesses.
  10. Remove the bracket from the old valve, and install on new one
  11. Use a razor knife to cut a small portion of the plastic water lines off.  You want a clean, straight water line to make a good seal.
  12. Pop the water lines into the valve.  This model had quick connect fittings.
  13. Install is basically the reverse from step 7.
  14. Check for leaks.
  15. Check for leaks an hour later.
  16. Check for leaks before bedtime.
  17. Check for leaks the next morning.  Note: The install is probably good if this step passes.
A couple of words of caution on this blog post that can be applied to almost any home repair.  Number 1, the correct parts for the repairs were not intuitively obvious to me.  I took a couple of pretty good guesses and got lucky.  That happens sometimes, but it also doesn't happen sometimes.  Call in a pro if you don't know what to do.  Check here for another blog post about finding the right contractor.  The Maytag repair man works on appliances every day and has seen it all.  He can probably hold his ear up to the refrigerator and know the right part.  Heck, it may even be in the truck.  For me, the risk was low on both parts.  Worst case = no ice, no water, and more begging. 
Number 2, messing up an install that involves water can be a literal disaster.  One of my friends had an issue with his refrigerator, and the thing sent loads of water into his basement.  You can save money now, and spend a lot later if you're not careful.  Call in a good contractor if the job seems too complex.

After the repairs, hopefully our refrigerator be with us for several more years.  The icemaker has even kicked out a tray of ice during the writing of this article.  For some reason, that sound makes me smile now.

Sunday, November 10, 2013

Ye Ole Garage Door

Hello?
"Honey, the garage door just fell"
Are you OK?
"Yes"
Is the car OK?
"Yes.  Do you know the name of the garage door company we used last time?"
I'll be home in a minute...

The issue wasn't as bad as it sounded.  One of our garage door rollers had broken, and only one part of the door had fallen.  Lucky for us, the other rollers were holding.  Did I call the garage door company?  Nope, just fired up YouTube for a quick how-to video and then drove to Lowe's.


The round thingy is supposed to stay on the metal rod.

The last time I called Overhead Door, a very unusual situation had rendered a giant hole in my garage door that a white Ford Taurus could drive through.  (Note: bourbon was not involved, and Big B was not at the wheel.)  The Overhead Door guys was great and showed up at 8:00 AM the next day to install a new one.  They're great when you need a new door or a broken spring needs to be replaced.  For this job, all you need are channel locks, the biggest screwdriver in your garage, pliers, and a good radio station.

The day of the incident, Lowe's had a 2-pack of replacement steel rollers for $5.  The door was back in business quickly, and your friendly neighborhood IT Pro was back at work without even changing clothes.  Fast forward to today.  Amazon shipped me a 10-pack of nylon rollers for $15, and the job was to replace all the rollers before the next one blew out.

Nylon Rollers
Here's all you need to do to get them installed:

1.  Get all the cars out of the garage.  You don't want a misstep to bring the garage door crashing down on your brand new Lexus.

2.  Find a spot in the garage door where all the rollers pass by when the door comes up and down.  On mine, this place was in the curve marked with the black sharpie.


3.  Yank the cord on the garage door opener.  Make sure that someone is holding the door, or you have it secured in some way.


3.  Pry open a spot in the rail.  For me, big channel locks did the trick.  Make sure that you bend the rail enough for the rollers to pass in and out.


4.  Using the biggest screwdriver in your garage, pry out the old roller from the rail, and manipulate the door to a spot where the old roller will come out.


5.  Slide out the old roller, and pop in the new one.  You might need the screwdriver to get the door in the right spot to push the new roller back in the rail.


6.  Move the door down to the next roller, and repeat 4 more times. 

7.  Using a big set of pliers, close the opening you just made on the rail.  Make sure that the rail looks somewhat like when you started.  Don't worry too much.  The rail doesn't need to pass the ball bearing test on the BMW assembly line.  Just shape the metal so the new rollers don't either get stuck or fall out.


8.  Follow the same steps on the other side of the door.

9.  Reattach the garage door to the opener.

10.  Test, test, test.

From everything I've read online, garage door rollers last about 15 years.  If yours are old, go ahead and buy a new set on Amazon and put them in.  It's much cheaper to do it now than after your garage door has smashed up one of your cars (or even worse, hits a person).  If one breaks, replace them all.  They were installed at the same time, and the old rollers will all break at approximately the same time, too.  Tip: Nylon rollers are much quieter than steel.  My door hums now, where it used to rattle like a roller coaster at Six Flags.  Install took about 30 minutes, and even a wanna-be home improvement guru like me can do it with the simplest of tools.


Monday, October 21, 2013

My Not So $188 TV

Curse Sam's Club.  They sent us a flyer in the mail specifically to "advantage" members.  Yes, us special folk can walk in the door at 7am and get a $1 discounts on apples and other various items.  This event had all the makings of black Friday in August.  Fast forward to Sunday night in the Sam's Club parking lot.  Employees were handing out bottled water and cookies, and they neatly arranged the customers in a line heading back towards the tire shop.  We were in the middle of the line, and I could already see that LED TV slipping through my fingers. 

Inside the store was a whole different story.  60" TV's were set up on flatbeds like jets on an aircraft carrier waiting to take off.  Tons of them.  Maybe people were too scared to grab them at $838.  Maybe the crowd was all spent out by the end of the month.  Not me.  Using a safe and prudent speed, I nabbed a flatbed and started piling it up to the ceiling.  Note: the ceiling at Sam's is pretty high.  The Discover card was maxed at the checkout line, and our Honda soon looked like the Grinch's sled from the Dr. Seuss Christmas special.  My family was about to enter the world of HD video, but not on the first try.

Yes, that's a 60" Vizio TV, and this post was
way too long to explain the ordeal of replacing
 the basement TV.  Maybe next time...
HD video is a totally new world compared to old school cable.  To see the difference in HD signals click here.  Basically, you get more pixels (dots) drawing the same picture, which translates into a much sharper, detailed viewing experience.  Although many things made it home that night, the first job was hooking up a 32" Magnavox LED TV (aka "the $188 TV) and a Samsung Sound Bar (HW-FM45C) in our living room. Piece of cake for an IT guy, right?  Not exactly.

After reading the books and a few posts on the internet, several problems started to materialize.  You've got to remember, that the TV's at Big B's house are behind the times.  My best TV was the 55" rear projection Mitsubishi in the basement that runs a lame 1080i picture only with the Blue Ray.  Please don't ask about the others.  The first roadblock was Time Warner Cable.

My ancient TV sets all have cable mini-boxes that cost $1.50 a month.  The new TV set has a digital tuner built in, so it was time to go boxless!  After several tries, the only channels that would tune in were basic cable, shopping channels, and others that needed to be programmed out.  At that, they all had goofy numbers like 21.1, 21.2, and 80.12.  A 45 minute call to the helpdesk got me a link to a PDF file converting the goofy channel number to the network and verification that my premium channels should be coming in.  A local dispatch was scheduled for the next day.  Chris basically followed the same steps as me to no avail, and then escalated my ticket.  The L2 tech verified that the premium channels are all scrambled.  Wait, that's not fair!  The digital tuner was receiving local channels over cable in HD.  The $1.50 cable box turn everything into crummy low def.  Renting the HD box was $10 a month, and two were needed.   The situation seemed lost until I looked at the back of the Roku box.

For those who have never seen one, a Roku is a little wifi enabled box that streams content to your TV set.  If you don't have a "smart" TV or blue ray player, one of these can be used to stream Netflix and Amazon video.  My family is a long time Netflix subscriber, and the Roku box got us in the world of streaming video.  My son can watch an entire season of Justice League in one sitting and even pause the show to go to the potty or eat supper.  The back of the Roku player had an HDMI input!  HDMI is a transport mechanism for full HD video and surround sound audio.  A few clicks in the settings, and the player was spitting out 720P video and surround sound from Amazon Prime!
 
A little surfing revealed that Time Warner has a Roku app that streams all the premium channels in full HD.  Did my first generation Roku support the Time Warner app?  Of course not.  A little more surfing, and a Roku 2 XD was headed to my house with 2 day free shipping courtesy of Amazon Prime.  I also clicked on a couple of 15 foot HDMI cables made by Twisted Veins. The cables were to rig up the soundbar, but that part of the story comes a little later. If you don't have a prime subscription, they're very handy. Not only are many items available with free two day shipping, but you get a ton of streaming content that is also free.  Full details are here.

After 2 long, long, long days of waiting, the Roku arrived.  The 2XD is the minimum model needed to get a 1080p picture.  Now for all you hi-fi geeks out there, my $188 Magnavox TV's maximum resolution is 720p.  Well in the IT world, we always say that you might want to upgrade later.  Within minutes, the Roku was hooked up, and my entertainment center looked like a scene from a Frankenstein movie.  Wires, power plugs, and speakers were going everywhere.  The next hour was spent searching the Roku channels and punching in passwords for Roku, Netflix, Amazon, and Time Warner Cable (TWC).  Wow.  The TWC app works like a charm.  It's like having a set-top box in HD for $60 (and no monthly fee).   TWC's HD box is $10 a month, so the payback was going to be fast.  I couldn't believe how great the HD picture looked, and all the premium channels were there with program information and schedules.  My not-so-smart TV just got smart!  With the cable TV issue solved, it was time to tackle the music.

Roku main screen

Several years ago, I bought my wife an XM radio.  My box of choice is a Roady 2 hooked to an FM transmitter.  Any FM radio in the house, yard, and probably my close-by neighbors can pick up whatever XM channel that is playing on 103.0.  The entertainment center had an ancient DVD player + surround sound combo that wasn't compatible with the new gear.  With Amazon and Netflix, the DVD player wasn't going to be missed.  We'd just head to the basement to watch a Blue Ray or DVD.  The lack of music, however, was going to be a problem. 


Time for a Pandora account.  Pandora has an app for just about any device.  The basic service is free, and you can pay a small monthly fee for additional features and no ads.  Pandora has some built-in channels by genre, or channels can be created by typing in the name your favorite artist.  The service is interactive, so you hit the thumbs up if you like the song that's playing and thumbs down if you don't.  Pandora will play other songs that are similar to the ones you like, and skip songs similar to the ones you don't like.  You can even hit the "I'm tired of this song" button, and Pandora will give it a break.  One time on our boat, I almost walked over to the XM radio and hunted for the thumbs down button after "Radioactive" had played what seemed like 10 times in a row.  Man, it would be nice if XM could do that too.  Within a few minutes, Jimmy Buffett, Chris Brown, Lady Gaga, and a couple of pop stations were added.  My wife likes Sade, so that one was programmed in just for her.  Music was blasting out the sound bar, and we were all jamming until "Thrift Shop" started playing.  As the kids were sitting on the couch and singing, F-bombs started dropping like a B-52 Stratofortress at war.  After what seemed like an eternity, one of us dove for the remote and powered off the system.  Note:  Pandora has an explicit content filter that can be activated to weed out the dirty words.  One last great feature of Pandora is that your channels will also follow you around on iPads, Androids, Smart TV's, and PC's. 

With all the technical details worked out, it was time to clean up the mess.  My wife didn't want me drilling holes in the shelves of the entertainment center, so a trip to Lowe's was in order.  I settled on a nice 2" piece of light colored wood for the sound bar to hang on.  We darkened the wood a bit with a stain marker, drilled a couple of small holes, and installed the new board with a couple of L- brackets.  Height for the sound bar is just above the TV, so the tweeters are somewhat close to ear level.  Cabling and fitting everything in was the hard part. 


The sound bar has multiple ways to input sound.  The best way is to use HDMI or fiber optic cable.  I decided to run HDMI from the Roku, into the sound bar, and another HDMI cable from the sound bar to the TV.  That means that anything coming from the Roku gets great sound.  The problem is that the TWC Roku app doesn't stream local channels.  The cable input and built-in tuner are needed for the locals, but the TV has no way to get sound to the soundbar.  If you're buying a TV that's more that $188, look for either a model that will match up with your soundbar via Bluetooth or 2-way HDMI signal (ex: Samsung TV + Samsung Soundbar) or get a TV with a fiber optic sound output.  If you go this route, the TV feeds the soundbar 100% of the time, which is much easier to deal with. 

Coax Staples for cable management


Back of the sound bar
Roku attached to entertainment center
with 3M Command Strip.  More coax
staples to run HDMI and power.

How does it sound?  Let me just that the quality of this Samsung unit is incredible.  The bar has 6 drivers plus a wireless subwoofer.  I've never heard speakers that could extend sound past the point of the tweeters.  Seriously, if a car drives by on the TV, the sound goes from one end of the living room to the other.  Movies have a full range of sound with good vocals.  Music is about as loud as you want your living room to be, without waking up the neighbors. 

Wireless Subwoofer


Interested in the totals?  This one was a little embarrassing.  Fabricating the mount, installing the sound bar, and cleaning up the cabling was a 4 hour job.  Configuring the Roku, troubleshooting the cable TV, and other miscellaneous research easily extended this out to a full day's work.  Yes, to cleanly rip and replace an old school TV and sound system is more like a weekend job.  Add up the soundbar, Roku, cabling, and wood, and $188 TV is more like $500.  Worth it?  Absolutely.  You should have seen the kids grinning from ear to ear last weekend when we were watching "LEGO Batman: DC Super Heroes Unite."  Daddy was grinning, too.


If you like hi-fi, this article may also interest you:  Basement Hi-Fi upgrade


Wednesday, July 17, 2013

Knife buying guide for dummies


The following conversation takes place with a person at work.  I was seeking advise on a much needed Christmas present from a person of the female persuasion.    

"Don't do it Big B"
Why not?
"Well we kinda want to keep you around here. Your plan would make her angry and put a lethal weapon right in her hands.
Hmmmm, do you think we can come up with an alternate plan where I survive to the end of the blog article?
"We need to lighten the blow."
How about if it's a family present?
"Man, that's pretty expensive for a family present."
I could get approval first?
"and it could still be a surprise."
Perfect.

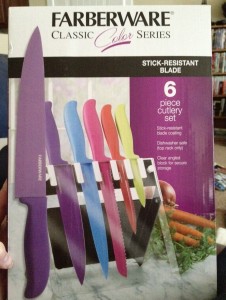
At our house, carving a turkey or cutting a bad piece of a steak used to be a religious experience.  I prayed every time for the strength to make it through the tough stuff with our super dull kitchen knives.  The 10 year-old Faberware set was just not cutting it anymore.  

Bourbon was poured, and I navigated straight to amazon.com.  After one beverage, the world of kitchen knives unfolded right before my eyes.  You pretty much have 4 choices, and price is directly related to quality.  


Cheap:  Our old Faberware set falls into this category.  Around 15 knives can be purchased for less than $100.  These are Wal-Mart style, budget models.  They will underwhelm you, and an upgraded set will haunt you every Christmas, just like me.

Our Henkel Set


Moderate:  Henkel and Victorinox have good sets in the $250-$400 price range.  Be warned, the name Henkel used to mean 100% pure quality.  Now, they make different grade knives as you'll see in the next category.  I'm no pro chef or anything like that, so some midrange Henkels were a perfect fit.  Since the knives were needed for Christmas Eve dinner, the Internet was not used.   Bed Bath and Beyond had the set in stock (with a 20% off coupon), so the knives were in a gift bag after a quick trip.  Hey, isn't that a Ginsu knife in the Henkel block?  Yes, sometimes you need to cut through a brick (or a rack of ribs).  Trust me, hacking through gristle, fat, or bone is all it's good for.


Expensive:  Be prepared to spend $1000 for these guys.  The main difference is the grade of steel.  The sets usually only have a few knives, and many times the steak knives are sold separately.  Henkel, Wusthof, and Shun are the brands in this category.  I'd recommend doing your homework before buying one of these sets.  Read the reviews on Amazon to understand the quality before spending the bucks. 


Ultra Expensive:  You don't buy a set of these.  The set is assembled one knife at a time.  The upside is that you only buy the knives that you really need, but you also need to be somewhat of a knife expert to know what to buy.  The brands are the same as the last category.  Some of these guys go for $200 a knife, so get our your credit card.  If you look closely, we have a Wusthof in our block. 

Trying my hand at knife sharpening.
Note the test carrot.


At a later point in the holiday season, Amazon made my shopping list.  We got an Amazon gift card for Christmas, and I remembered seeing a knife sharpener at the bottom of the screen while looking at knife sets.  What???  Knifes need to be sharpened?  Somewhere in the back of my mind, I knew as much.   The gift card was burned on the "Presto EverSharp Electric Knife Sharpener".  You basically pull the blade through 4 slots on the machine to put a sharp edge back on.  How often to sharpen them?  Well, depends on how much they're used.  A super chef probably does this all the time, but ours get tuned up about every 3 months.  You'd be surprised how much better they cut after a good session.  BONUS: This unit also sharpens knives with serrated edges.

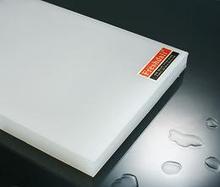
One more tip before you leave.  Using an expensive knife on a glass cutting board or plate is generally a bad idea.  The surface doesn't have any give and the edge wears off the knife blade much quicker.  We picked up a set of composite models that work great and keep the knives sharp longer.  Wooden boards also work well.  


How did the gift go over?  Well, I didn't suffer any puncture wounds, and my wife appreciated the "family gift" very much.  The Christmas ham and turkey carved like warm butter, and prayer was only used before the meal to give thanks.

Sunday, April 28, 2013

Back to the Basics - Weather Stripping

Back to the basics - Weather Stripping NOTE:  This blog story takes place just before "Replacement Window RFP". 

That chair is my place.  Used to
 be the coldest seat in the house.


We had just received a sizable windfall and were pondering all the options.  Our drafty Ball home was freezing us to death in the winter.  No joke, you needed a coat at dinner time if you sat in the chair closest to the door.  We needed new doors and windows, but the cash was only going cover one of the options.  The decision did not become apparent until the furnace crapped out.

Lucky for us, our HVAC guys are good.  Charles from B&D Refrigeration came out to fix the furnace issue, and we posed the question to him.  He took one look at the doors and gave us the answer.  "I'd get the windows and just repair the doors".  The builder either forgot to install weather stripping, or it was worn out so bad that the wind could blow in.   To make matters worse, the door was not hung level.  Excessive upward force was required on the door if you wanted to throw the dead bolt.  On a bright, sunny day you could see a nice sliver of light between the door and the frame.  The next call was to our favorite handyman.

We had a backlog of stuff for Alvin to do:
  • Paint exterior
  • Repair bricking on back of house
  • Seal doors
  • New door hardware
  • Level doors
Alvin is one of the best handymen in the area.  If you don't have a guy like him, you really need one.  Compared to me, he's the Yoda of home repair.  He can wave his hands and things magically go into place.  He can do stuff with vice grips that I can't pull of with real tools.  We've known him for 10 years and hope that he'll never retire.

One of the things we had Alvin do was install new door handles and dead bolts on all the doors.  For some reason I don't understand, the back doors had different keys than the front.  That's just a little too complex for me.  One house key is plenty.  Rekeying the locks in your place is something that should be done shortly after move-in, and we hadn't done it yet.  Who knows how many people had keys?

Alvin reset the door, repaired the rotten wood, and installed something called weather stripping.  Weather stripping is a foamy, rubberish material that goes around your entire door frame.  The stuff comes in all different shapes and styles, so check your doors before heading off to Lowe's.  Our doors have a groove around the entire frame, and the weather stripping has a tab that slides right into the groove.  After doing a little research for this article and looking at the doors, I bet installation took about 15 minutes on each door.


The black stuff is weather stripping


Top Pic


So what happened?  The difference was night and day.  Where a screen door previously existed, a solid door materialized.  My chair is no longer the coldest seat in the house, and the coat can stay in the closet.

My recommendation?  Check the weather stripping if your doors are drafty.  Odds are that you can do a simple repair that won't cost must money. 
Would I do the job myself next time?  Yep.
What about the next windfall?   Hmmmmmmm.....

Tuesday, March 26, 2013

Big B's Budget Part II

Big B's Budget Part II


OK, get out your virtual pen and check off the items that are complete:

___   Excel
___   Bank account for personal escrow funds
___   Summary of fixed, variable, and non-monthly expenses

If you don't have checkmarks in all 3 slots, this articles won't be much help.  Head back to Part I of Big B's Budget Blog for your homework assignment right here. 

Now for the big question, how did the budget turn out?  Mine had a few surprises (like negative cashflow).  Assembled below are some of the best tricks I've come up with since living on a budget.  Nope, none of the concepts were stolen from Dave Ramsey, Wikipedia, or mint.com.  They all came from the school of hard knocks.

You need a suitcase full of these to buy anything.


Fun Money

This is the toughest budgetary item for most folks out there.  First, decide how much money to spend on the frivolous, unnecessary items.  For people making tons of money, you're probably OK putting all the money in one line item and discussing the items as you go.  If fun money is a very low amount, or you can never agree on how to spend the money, give everyone in the family an allocation of cash.  My budget had this issue early on.  We had a puny $100 to dump in this bucket.  Well, it was really more like a thimble.  The spreadsheet had 2 line items:
     Me           $50
     Her           $50

Her


The money could be used for eating out, computer games, or setting a fire in the back yard with $1 bills.  If we went out to eat, she could have the $35 lobster tails with a glass of wine.  I could suffer through the $6 meatloaf, but pick up a copy of Diablo II at Best Buy on the way home.  You get the drift.  As an added bonus, the leftover fun money carried into next month's budget!  That way, we could eventually buy stuff that cost more than $50.  Small loans into next month were also permitted for special occasions.

Me


Windfalls

In the pre-budget days, my first windfall was about $1,000.   WOW!!   My first thought was that we had plenty of money to do anything in the world.  Fun stuff got slapped on the credit card like mad until the statement came in. A quick calculation showed that the windfall was spent approximately 2.5 times. I don't remember pondering this one over a bourbon, but it was probably the case. After the "windfall disaster", a new worksheet appeared in Excel named "Bonus Money". The after tax amount is listed at the top, line items summarized, and the remainder is computed right under the amount.  We take great care these days in planning bonus money, and doing it is fun to boot. All of the money is either spent on things that are agreed on or put into an interest bearing account. How do we pick things to spend the money on? Check out the "Long Term Projects" tab. Yes, future house blog articles are listed in priority order here with an approximate cost. 


Scratching your head and wondering how you get windfalls?  Here are a few ideas:
  • If you get paid biweekly, only budget 2 paychecks each month.  That way, 2 paychecks each year are windfalls!  (well, technically you get 3 every 7-8 years)
  • Set federal and state withholdings, so you get a tax return instead of paying.  Don't go crazy, Uncle Sam doesn't pay interest.
  • Get a credit card that pays cash back, like my Chase Rewards Visa.  Withdraw the money for a windfall when the money builds up.
  • CHRISTMAS MONEY!!!
What is the HSA tab?

Up until recently, my company had a Cadillac health insurance policy that included $10 doctor visits, $15 prescriptions, and no deductable.  My first son was born to the tune of $100.  Seriously.  Fast forward to corporate cost cutting ideas and high deductable health care plans.  Family plans with a $3,000 deductables are common now.  That's tough on a monthly budget, but Uncle Sam has a program to assist with some of the cost.  If you have an HSA plan at work, an account can be opened to pay for medical bills.  Any money deposited into the HSA savings account is pre-tax, so the money doesn't make it to the Taxable Earnings column of your paycheck.  We deposit enough money in this account to pay for 100% of medical costs.  Doctor bills and prescriptions are entered in this tab and paid with the Chase Visa card (earning us a 1% rebate), and money is moved out of the HSA account to cover the bills. 

Short Term Savings


Lots of the expensive stuff in your house has a tendancy to break over the long haul like hot water heaters, A/C coils, microwaves, and TV sets.  Cars have the same problem. Most monthly budgets can't handle a $2,000 repair bill, even if you eat refried beans all month.  While we still had 2 incomes, my wife shoveled money into an account to pay for expensive, incidental items.  Ours is set up in a brokerage account that is invested in bonds and a money market cash fund.  Unless you have a bigger pile of money than the picture, stick to funds that are easily liquified.  Sure, Verizon stock pays a great dividend, but what if you need $4,000 to pay for a new roof when the Dow is down 1,000 points?   If you don't have a rainy day fund, start one now.  Either take a windfall and sock it away or allocate money each month to build one up.

Donations

Last but not least, the donations tab keeps track of money that we donate to charity.  We give money to several causes throughout the year, and I print this tab before going to the tax guy. 

Parting Thoughts

Big B's budget has evolved over nearly 20 years, and it works for our household like a charm.  Feel free to take any of the ideas in the article and add new ones that pertain to your own personal life.  Managing your money with a budget over time can greatly reduce the stress in personal finances.  What if the greatest stress in your budget was how to spend a windfall?  That's my dream.

Interested in tips to lower your electricity bill?  Click here

Wednesday, March 6, 2013

Big B's Budget Part I

Big B's Budget Part I
How do you pay for all the things that you do your poor house? Simple, I cashed in a Powerball ticket for $100 million. 


Well.........  Not really.......  Winning large sums of money isn't really something I'm good at.  My luck is pretty good with insignificant things like parking in the food court at the mall on Christmas Eve, but winning money isn't a big strength.  This story begins with a couple trying to save for their first house.  After 2 years of "saving", our household had actually racked up about $2,500 in credit card debt.  After a particularly bad confrontation about not owning a house, I figured out something that most people don't understand.  Unless you're Britney, Oprah, or Donald Trump, you need a budget.

A budget?  Won't that force me into living like a pauper?  It could, but if you do it right, you'll feel wealthier than ever.  How to get started?  First you need Excel.


My journey at budgeting started with Excel 4.0 (man I'm old), no bourbon (too poor), and no Google (it didn't exist yet).  You're lucky today, because you get a head start with the latest and greatest gear.  Microsoft Office Home and Student 2010 runs for about $100 on sale at Best Buy, Staples, or Office Depot.  Pick up a copy even if you're not an IT guy.  You don't even need to start from scratch, because I've included my budget template.  Click right here to open it up: budget_template.xlsx.  Note: The values in the spreadsheet have been changed around a little to simplify the exercise.

Next, separate your expenses into 3 categories: fixed, variable, and non-monthly.  My list goes something like this:

Fixed: House Payment, Gas, Phones, Power, Netflix, Cable TV, Security, Newspaper, Discretionary Money, and Savings
Variable: Sewer/Water, Groceries, Vehicle Maintenance, Gasoline, Pets, Clothing, Kids, Misc, , and Cell Phones
Non-Monthly: Car Insurance, Property Taxes, Homeowners Insurance, Preschool, and Springtime Yard Work


Tip: something that my household does to make the numbers more predictable is allow the utility companies to put us on a "budget" plan.  They check recent usage, and the bill is the same every month.  They'll also have a settle-up month where you get a credit for money not used or a bigger bill for a shortfall.

Monthly Expenses
Open the template and click on the "Bills" tab.  The fixed expense amounts are on the left and variable expenses on the right.  Pull out your last month's bills and fill in the numbers.  Make a good guess on the variable expenses.  They can be fined tuned as you go along.  The "fun+save" tab has a place to keep track of discretionary spend and non-monthly bills.  Let's leave the discretionary money alone for now and head to the non-monthly expenses.


Your Personal Escrow Account (Nonmonthly Bills)
Punch in the non-monthly bills, add up the total, and divide by the number of paychecks you get in a year.  The spreadsheet has a spot to work this equation for you.  People that get paid biweekly have 26 pay periods as a rule.  Some years are 27, but let's not get that complicated.

Now, take a break from Excel and head to the bank.  Open up a savings account that draws interest. We'll call this your personal escrow account.  Take the "Escrow Budget (Pay Period)" number from the spreadsheet and set up an automatic draft from your paycheck or checking account into your personal escrow account.  Each paycheck will deposit money into the escrow account.  My company has a credit union that works well for this task.  This new account separates your monthly budget money from the non-monthly money and also draws interest.  All your non-monthly bills get paid from here. Note: The spreadsheet has a calculation to show deposits into the account.  Depending on where the non-monthly bills fall, you may need to start the account with an initial amount.  That's so you don't go negative during the year.  My example needs an initial $1,100 to keep it running.

Tip:  If you get paid biweekly, try as hard as you can to live on two paychecks a month.  That way you get an extra two paychecks to spend each year.  We take one paycheck to spend on Christmas and apply the other one towards a family vacation. 


Setting Up The Budget
Head back to the main page of the spreadsheet, and let's get started on income.  Add the "net" amount of money you typically get from paychecks and other income (like tips).  This amount is after taxes, insurance, 401K, and pretty much everything else that drains your check.  Next, subtract out the escrow account money from each check.  The template uses $1600 per pay period for budget income ($265 is taken off the initial amount).  This amount is your budget income.  Summarize your fixed and variable expenses and add them up to get the "budget expense" number.  Subtract expense from income.  If the number is positive, that's really good.  You have leftover money.  If the number is negative, it could explain why you're getting deeper into debt.  (Don't feel bad, most of us have been there before.)

Now what?  Punch in your expenses into the "actual" column during the month.  The spreadsheet will calculate your total spend at the bottom.  Monday night is my time to pay bills and type receipts into the spreadsheet.  I use "save as" to make a copy of this spreadsheet for each month.  Printing a copy out in the middle of the month for the wife/husband helps keep the budget on track.  You'll also want to make some adjustments to the budget after getting all the numbers on the computer for a few months.

Hey, what are those other tabs for?????  Click here for the budget blog Part II, which has more details and lessons we learned from living on the budget for over a decade.

Got a question?  For the first time, I'm soliciting feedback on the house blog.   Go ahead and email suggestions, questions, and comments to: houseblog@theroysefamily.com.

Interested in tips to lower your electricity monthly bills?  Click here.
Read this article to see how to lower your phone bill to $25 a year.